
1) Patch mode
- Overview
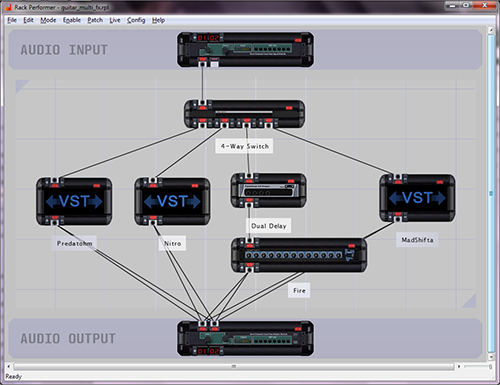
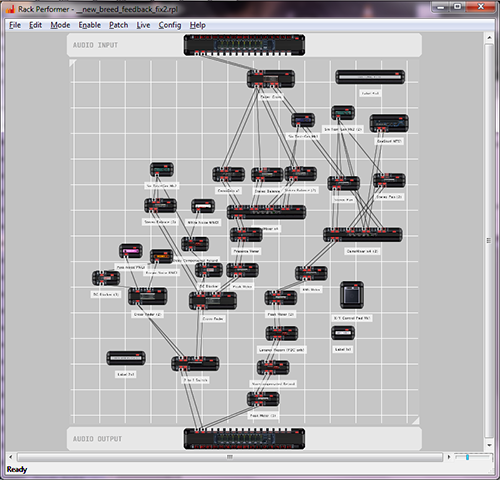
When you launch the application and load a document, you start in patch mode. In this mode Rack Performer is a standard windowed application. The center of the window is called the patcher, this is where the signal flow is configured and it is also the place where modules are created.
Rack Performer is a modular host: the sound is created and processed by connecting together various instruments and effects, which are called modules. The action of interconnecting these modules together is called patching, and the end result when modules have been selected and patched together is just called a patch.
- Accessing patch mode
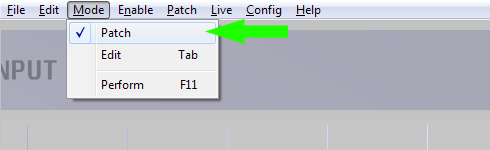
You can access patch mode at anytime by using the "mode" menu. Alternatively you can also use the easy to remember Tab key.
- Modules in patch mode
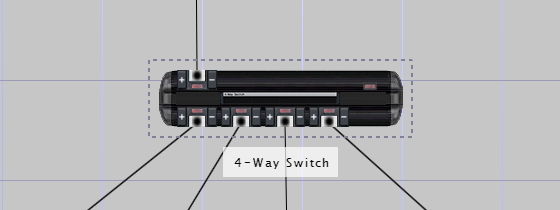
Modules are represented by a black box in the patcher. They can have input ports, represented by slots located at the top of the box. And they can have output ports too, represented by slots at the bottom. Some modules have no ports, and the one pictured above for instance has 1 input and 4 outputs.
- Basic operations: patching audio links
To patch modules together and create audio links, click on any output port of the source module and drag the mouse cursor (holding the left click) until you reach the input port of the destination module, then release the click. A patch link will be created.
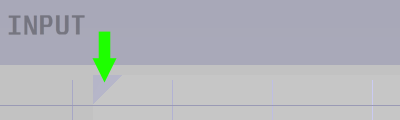
We will see how to create patches in the next guide, meanwhile just remember that the signal always flows from the top of the patcher, where audio inputs are located, to the bottom of the patcher, where audio outputs are located.
- Basic operations: selecting modules
To interact with modules in the patcher you need to select them. To select a single module just click on it. To select multiple modules, hold your left-click on the background of the patcher and drag to create a lasso selection and surround them.
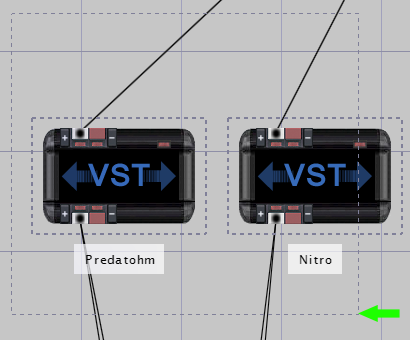
Selected modules are represented by a dotted frame around them. All actions are performed on the current selection, be it one or many modules.
- Basic operations: displaying module context menu in patch mode
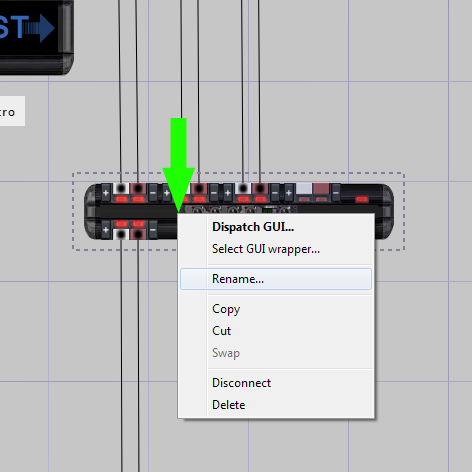
Right-click on any module in the patcher to display the context menu for the current selection. Advanced actions are always accessed via context menus in the application, do not hesitate to right-click everywhere!
- Basic operations: navigating in patcher
By default the patcher expands and shrinks to adapt to its content. When it grows large, you can use the scrollbars to navigate. Alternatively you can pan the patcher view around by holding the space key on the keyboard while holding the left-click on the patcher background and dragging the cursor.
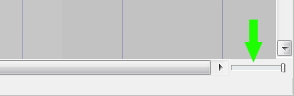
At the bottom of the screen is a small slider zoom control, allowing to zoom in and out at will. Alternatively you can use the mouse wheel to get the same effect.
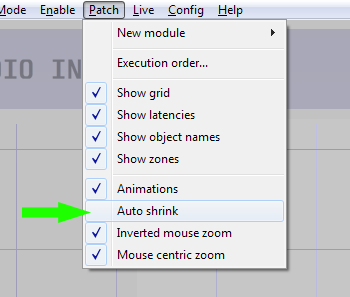
Patcher options can be set in the "patch" menu and you can try to disable auto-shrink there and see if you are more comfortable with it than the default mode.
When auto-shrink is disabled, two triangular zone size controls appear at the opposite corners of the zone surrounding the modules. Drag these controls to manually resize the patcher.
- Next steps: creating larger patches
This is all you need to know about the patch mode for now. With just these basic operations you will be able to create anything from simple effect chains to complex and large patches.
2) Edit mode
- Overview
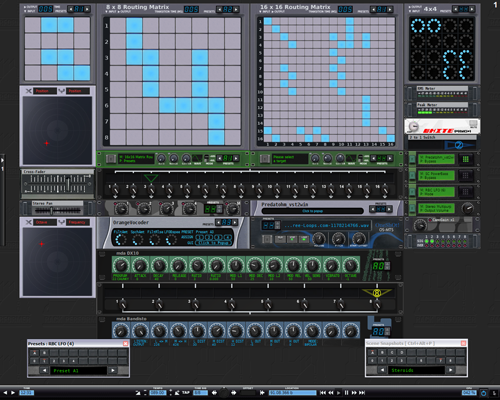
Edit mode is where you actually play music in Rack Performer. In this mode the application switches to full-screen and the virtual screens are displayed. There are 8 virtual screens per monitor connected to your machine, and the application supports up to 4 monitors.
The module user interfaces, often shortened to the GUI acronym, are dispatched on the various virtual screens. You can arrange them the way you like to suit your preferences and they are always quickly accessible.
- Displaying menu in edit mode
In edit mode the application window and menu are hidden, in order to maximize screen space. To display the menu just move your mouse cursor to the top of the screen and touch the slim grey bar, and the menu will drop down.
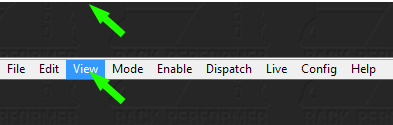
Move the mouse cursor away and the menu auto-hides.
- Accessing edit mode
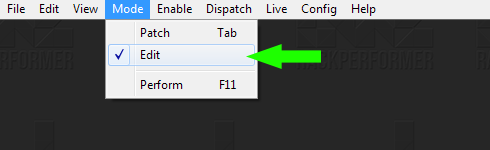
You can enter edit mode at any time by using the "mode" menu. Alternatively the Tab key shortcut achieves the same result.
- Virtual screens and screen switcher
Virtual screens are managed by the floating toolbar located on the left side of the screen and known as screen switcher. From there you can create, delete and re-order the virtual screens.
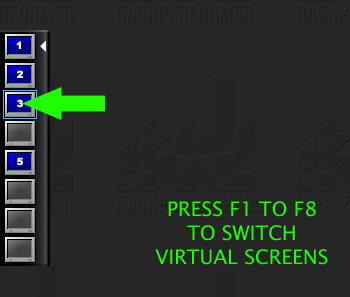
Once created you can switch the active screen in a flash, either by using the screen switcher, the keyboard shortcuts or even with your MIDI controller.
Clicking on the screen switcher background allows to alternatively collapse and expand it, again in order to gain screen real-estate. Right-clicking on the screen switcher displays its context menu.
- Dispatching module GUIs
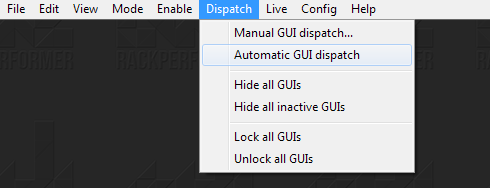
Whether you use the "dispatch" menu or the module context menu in patch mode, you will be able to chose where the individual module GUI's will be located on the virtual screens, this is called dispatching.
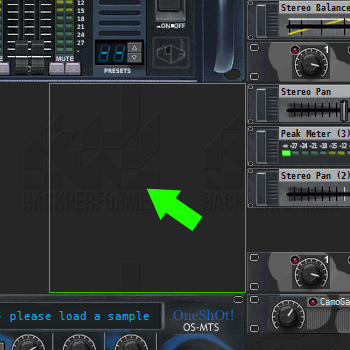
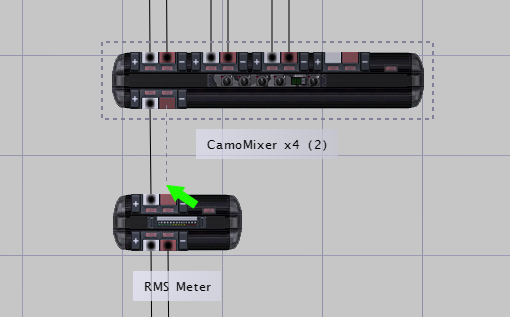
When dispatching a module GUI, a green frame matching the GUI size will follow your mouse. Switch to the desired virtual screen and place the green frame where you want to dispatch the module GUI. Modules can't overlap, if the frame is red it means dispatching is not possible at this location.
- Module control focus
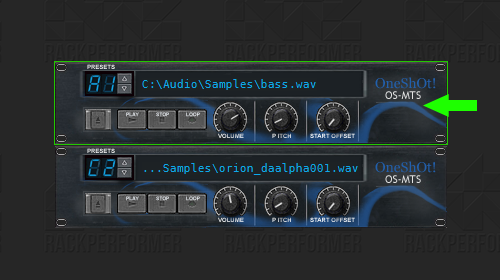
An important feature of Rack Performer is called module control focus. The module currently receiving control focus has a green frame drawn around its GUI. As long as the control focus stays on this module, controllers will converge on it, allowing easy interaction.
For instance, if a MIDI keyboard is setup, it will be automatically redirected to the module having control focus. In a similar way, the (computer) keyboard mapper will target the module too and enable generic interactions, like changing presets and muting the output... But this is already out of the scope of this guide.
- Module context menu in edit mode
Exactly like in patch mode, all advanced operations on the module are performed via the context menu. Please note that its content are not the same in edit mode and offer a different set of commands.
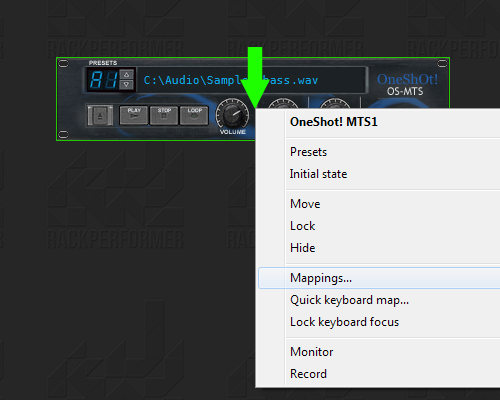
To display the module context menu just right-click on the module GUI. Note: for 3rd-party plugins you need to click on the part of the GUI that belongs to the application (usually a frame around the plugin own interface)
- Control port context menu
Without entering into too much details, modules have parameters that we call control ports. This is by interacting with these control ports and changing their values that you select the sound of the various instruments for instance, or change the intensity and character of an effect.
There are many ways to interact with control ports but the simplest one is to interact with the graphical controls on their GUI's: knobs, faders, push buttons and keys are all examples of graphical controls and you can interact with them by using your mouse.
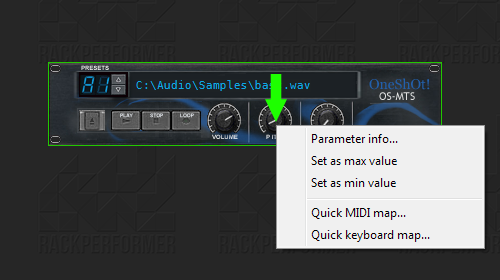
Control ports also have a specific context menu with advanced actions. To display it right-click on the graphical controls.
- Transport bar

To conclude this quick tour of the edit mode, we need to mention the transport bar. It is located at the bottom of the screen and contains all master clock and synchro controls.
It can be collapsed like the menu by clicking on the pin button at the extreme right, or alternatively using the Ctrl+Tab shortcut will quickly toggle it.
3) Perform mode
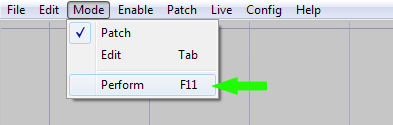
When you are ready to go on stage and perform live in front of the audience, you enable perform mode. In perform mode everything that could interrupt or be harmful to your musical performance is disabled.
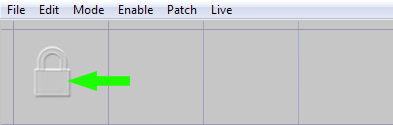
The application becomes locked down and focused only on real-time performance and patcher operations are disabled.
4) Enabling and disabling power
- Enabling power
In order to produce sound the patch must be powered on. When powered on, the required hardware resources are allocated (sound card, MIDI devices, etc.) and the application engine is running.
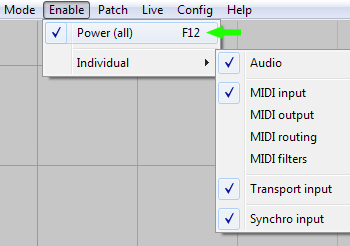
To power on the patch you can use the "enable" menu or alternatively use the handy F12 keyboard shortcut.
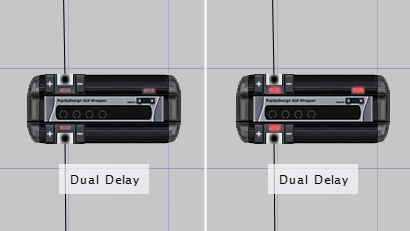
Power status is visible in patch mode as connected modules LED's are activated accordingly.
- Alternative way to enable power in patch mode
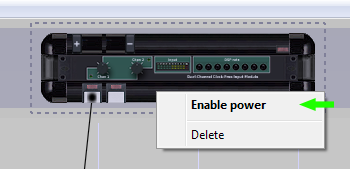
You can also enable power via the master module context menu in patch mode.
- Alternative ways to enable power in edit mode
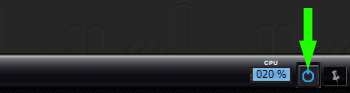
In edit mode you can enable power with the power button on the transport bar.
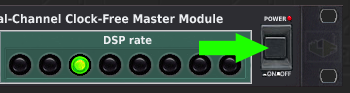
Alternatively, master modules also have a power button on their GUI.
- Next steps: play some music!
This concludes our introductory guide. At this point you should be able to play music with and within Rack Performer by yourself, and still have a lot of exciting features to discover!
Our next guide will show you: how to create your first patch.
- Overview
When you launch the application and load a document, you start in patch mode. In this mode Rack Performer is a standard windowed application. The center of the window is called the patcher, this is where the signal flow is configured and it is also the place where modules are created.
Rack Performer is a modular host: the sound is created and processed by connecting together various instruments and effects, which are called modules. The action of interconnecting these modules together is called patching, and the end result when modules have been selected and patched together is just called a patch.
- Accessing patch mode
You can access patch mode at anytime by using the "mode" menu. Alternatively you can also use the easy to remember Tab key.
- Modules in patch mode
Modules are represented by a black box in the patcher. They can have input ports, represented by slots located at the top of the box. And they can have output ports too, represented by slots at the bottom. Some modules have no ports, and the one pictured above for instance has 1 input and 4 outputs.
- Basic operations: patching audio links
To patch modules together and create audio links, click on any output port of the source module and drag the mouse cursor (holding the left click) until you reach the input port of the destination module, then release the click. A patch link will be created.
We will see how to create patches in the next guide, meanwhile just remember that the signal always flows from the top of the patcher, where audio inputs are located, to the bottom of the patcher, where audio outputs are located.
- Basic operations: selecting modules
To interact with modules in the patcher you need to select them. To select a single module just click on it. To select multiple modules, hold your left-click on the background of the patcher and drag to create a lasso selection and surround them.
Selected modules are represented by a dotted frame around them. All actions are performed on the current selection, be it one or many modules.
- Basic operations: displaying module context menu in patch mode
Right-click on any module in the patcher to display the context menu for the current selection. Advanced actions are always accessed via context menus in the application, do not hesitate to right-click everywhere!
- Basic operations: navigating in patcher
By default the patcher expands and shrinks to adapt to its content. When it grows large, you can use the scrollbars to navigate. Alternatively you can pan the patcher view around by holding the space key on the keyboard while holding the left-click on the patcher background and dragging the cursor.
At the bottom of the screen is a small slider zoom control, allowing to zoom in and out at will. Alternatively you can use the mouse wheel to get the same effect.
Patcher options can be set in the "patch" menu and you can try to disable auto-shrink there and see if you are more comfortable with it than the default mode.
When auto-shrink is disabled, two triangular zone size controls appear at the opposite corners of the zone surrounding the modules. Drag these controls to manually resize the patcher.
- Next steps: creating larger patches
This is all you need to know about the patch mode for now. With just these basic operations you will be able to create anything from simple effect chains to complex and large patches.
2) Edit mode
- Overview
Edit mode is where you actually play music in Rack Performer. In this mode the application switches to full-screen and the virtual screens are displayed. There are 8 virtual screens per monitor connected to your machine, and the application supports up to 4 monitors.
The module user interfaces, often shortened to the GUI acronym, are dispatched on the various virtual screens. You can arrange them the way you like to suit your preferences and they are always quickly accessible.
- Displaying menu in edit mode
In edit mode the application window and menu are hidden, in order to maximize screen space. To display the menu just move your mouse cursor to the top of the screen and touch the slim grey bar, and the menu will drop down.
Move the mouse cursor away and the menu auto-hides.
- Accessing edit mode
You can enter edit mode at any time by using the "mode" menu. Alternatively the Tab key shortcut achieves the same result.
- Virtual screens and screen switcher
Virtual screens are managed by the floating toolbar located on the left side of the screen and known as screen switcher. From there you can create, delete and re-order the virtual screens.
Once created you can switch the active screen in a flash, either by using the screen switcher, the keyboard shortcuts or even with your MIDI controller.
Clicking on the screen switcher background allows to alternatively collapse and expand it, again in order to gain screen real-estate. Right-clicking on the screen switcher displays its context menu.
- Dispatching module GUIs
Whether you use the "dispatch" menu or the module context menu in patch mode, you will be able to chose where the individual module GUI's will be located on the virtual screens, this is called dispatching.
When dispatching a module GUI, a green frame matching the GUI size will follow your mouse. Switch to the desired virtual screen and place the green frame where you want to dispatch the module GUI. Modules can't overlap, if the frame is red it means dispatching is not possible at this location.
- Module control focus
An important feature of Rack Performer is called module control focus. The module currently receiving control focus has a green frame drawn around its GUI. As long as the control focus stays on this module, controllers will converge on it, allowing easy interaction.
For instance, if a MIDI keyboard is setup, it will be automatically redirected to the module having control focus. In a similar way, the (computer) keyboard mapper will target the module too and enable generic interactions, like changing presets and muting the output... But this is already out of the scope of this guide.
- Module context menu in edit mode
Exactly like in patch mode, all advanced operations on the module are performed via the context menu. Please note that its content are not the same in edit mode and offer a different set of commands.
To display the module context menu just right-click on the module GUI. Note: for 3rd-party plugins you need to click on the part of the GUI that belongs to the application (usually a frame around the plugin own interface)
- Control port context menu
Without entering into too much details, modules have parameters that we call control ports. This is by interacting with these control ports and changing their values that you select the sound of the various instruments for instance, or change the intensity and character of an effect.
There are many ways to interact with control ports but the simplest one is to interact with the graphical controls on their GUI's: knobs, faders, push buttons and keys are all examples of graphical controls and you can interact with them by using your mouse.
Control ports also have a specific context menu with advanced actions. To display it right-click on the graphical controls.
- Transport bar
To conclude this quick tour of the edit mode, we need to mention the transport bar. It is located at the bottom of the screen and contains all master clock and synchro controls.
It can be collapsed like the menu by clicking on the pin button at the extreme right, or alternatively using the Ctrl+Tab shortcut will quickly toggle it.
3) Perform mode
When you are ready to go on stage and perform live in front of the audience, you enable perform mode. In perform mode everything that could interrupt or be harmful to your musical performance is disabled.
The application becomes locked down and focused only on real-time performance and patcher operations are disabled.
4) Enabling and disabling power
- Enabling power
In order to produce sound the patch must be powered on. When powered on, the required hardware resources are allocated (sound card, MIDI devices, etc.) and the application engine is running.
To power on the patch you can use the "enable" menu or alternatively use the handy F12 keyboard shortcut.
Power status is visible in patch mode as connected modules LED's are activated accordingly.
- Alternative way to enable power in patch mode
You can also enable power via the master module context menu in patch mode.
- Alternative ways to enable power in edit mode
In edit mode you can enable power with the power button on the transport bar.
Alternatively, master modules also have a power button on their GUI.
- Next steps: play some music!
This concludes our introductory guide. At this point you should be able to play music with and within Rack Performer by yourself, and still have a lot of exciting features to discover!
Our next guide will show you: how to create your first patch.